| User Defined Colors | |
|---|---|
|
The following buttons appear in the [User Defined Colors] tab of the Color Matching Table (Figure 1). These options manage your User Defined Colors.
Click the [Edit] button to change the settings for the selected color. If this is an "Alias" to a System Defined Color, you may enter the name of the alias. If this is a [User Defined Color]you may enter the name or L*a*b* values as necessary.
Click the [Add Alias] button to create a new name for a color with the same specifications of a previously defined color. The [Add Alias] option allows you to give a color another name.
Click the [Search] button to quickly locate a specific color name.
Click the [Replace] button to search for certain words and replace those words with words of your choice.
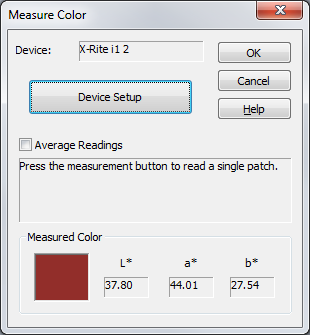
Click the [Add] button to create a new color (Figure 2). This option allows you to enter the name for the color and specify the *L*a*b values for that color, or you can click the [Measure Patch] button to display the Measure Color dialog (Figure 3). As long as the names in RIP-Queue match the names you used in you graphics application and the PostScript/PDF files, the "Color Matching Table" will be able to identify the color values.
Click the Delete button to permanently remove a user defined color or alias. If you delete the original color for an alias, the alias will continue to exist, although it will not have any color values or a color indication swatch.
CAUTION: You are not given a confirmation dialog or a chance to back out of the deletion. Make sure you have the correct color selected before you click [Delete].
Click the [Import] button to import a Color Table File from another system.
Click the [Export] button to create a Color Table File based on the colors defined in your [User Defined Colors] tab. You can then import it into other RIP-Queue. |
Figure 1
Figure 2
Figure 3
|


